Submitting a project for inclusion on this site
If you are a UCLH researcher, you can submit details about your own research project(s) and have them added to this site.
Whilst some experience of version control with git and GitHub would be beneficial, the guidance below tries to assume as little prior knowledge as possible and sticks to making changes via the GitHub user interface. Contributors with more experience may want to take a different approach.
Step 1: Upload datasets and code to a research data repository
Step 2: Clone our repository on GitHub
Step 3: Complete the project template
Step 4: Make a pull request
Step 1: Upload datasets and code to a research data repository
To help people who are interested in your research to better understand what data you have used and how you process it, it can be helpful to generate a synthetic dataset which you can share together with any relevant computer code in an open-access repository. We recommend using UCL’s institutional research data respository service as it is free for all UCL researchers to use and provides an embed link which can be used to include your data alongside details about your project on this site. Please read the guidance on the UCL Library Researd Data Repository page for details on how to prepare and upload your data.
Once your submission has been approved, you can find the embed URL by navigating to your deposit’s page and selecting ‘Embed’ from the menu. Copy the iframe tag and include this in one of the html or markdown files you create in Step 3.
Step 2: Fork our repository on GitHub
To complete the next steps you will need a GitHub account, which will enable you to take a copy of the site’s code and later merge your changes back in. If you don’t have one you can sign up for free.
The source code for this site can be found on GitHub: github.com/SAFEHR-data/uclh-research-discovery. To make a copy you can make changes to, you can fork the repository. You can do whatever you want with the forked copy once you’ve made it, and then create a pull request (see below) to have your changes merged back into the original code base.
To start, make sure you’re logged into your account, and then find the fork button on this site’s GitHub repository and click “Create a new fork”:

In the form that follows, select your username from the Owner dropdown menu, then click “Create fork”. A copy of the repository should then appear under your own username with a note beneath the title saying “forked from github.com/SAFEHR-data/uclh-research-discovery”.
Step 3: Complete the project template
Once you have forked the repository, you can start adding your project. The pages for each project are kept in separate folders under /_projects. Start by creating a new folder for your project containing an index.md file.
The index.md file
Whilst you might be used to making a new folder before creating the files that go in it, GitHub doesn’t actually let you create an empty folder, so you need to create both the folder and your first file at the same time. Every project folder must include a file called index.md, which serves as the landing page for your project, so that’s probably the best place to start:
-
From the main page of the forked repository, select the
_projectsfolder from the file explorer table.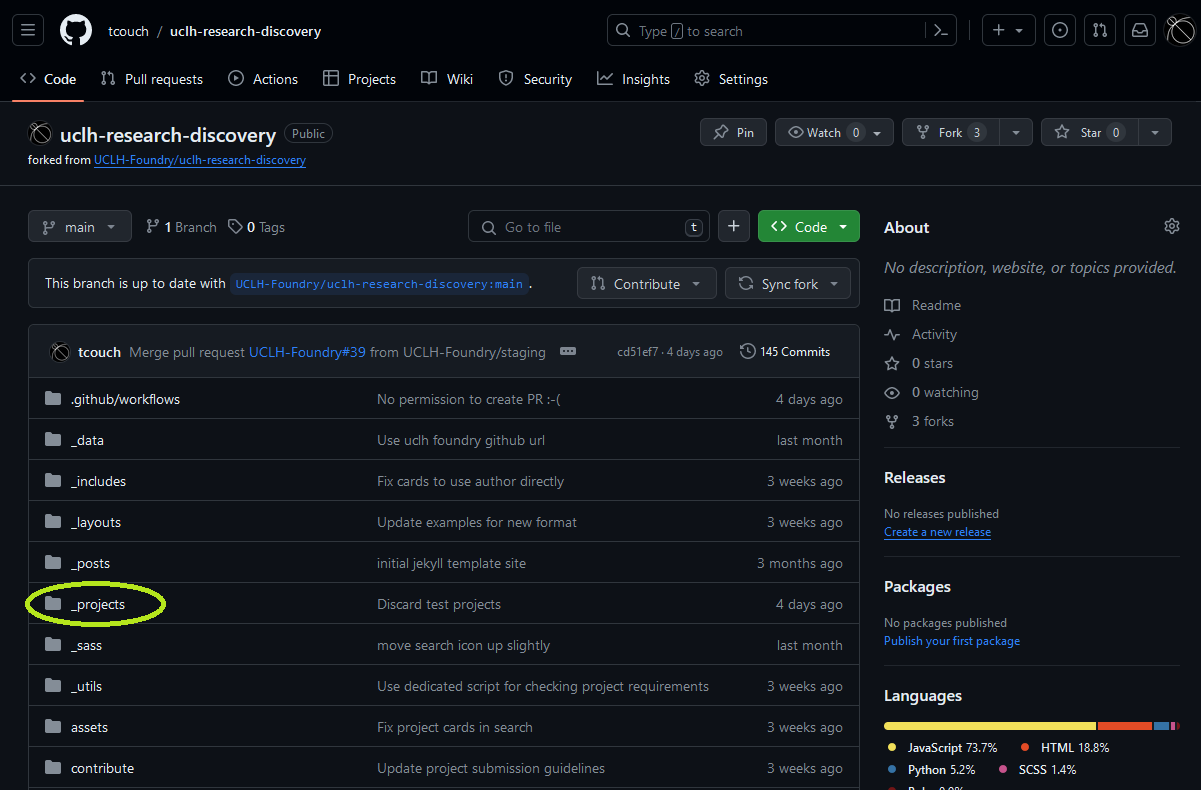
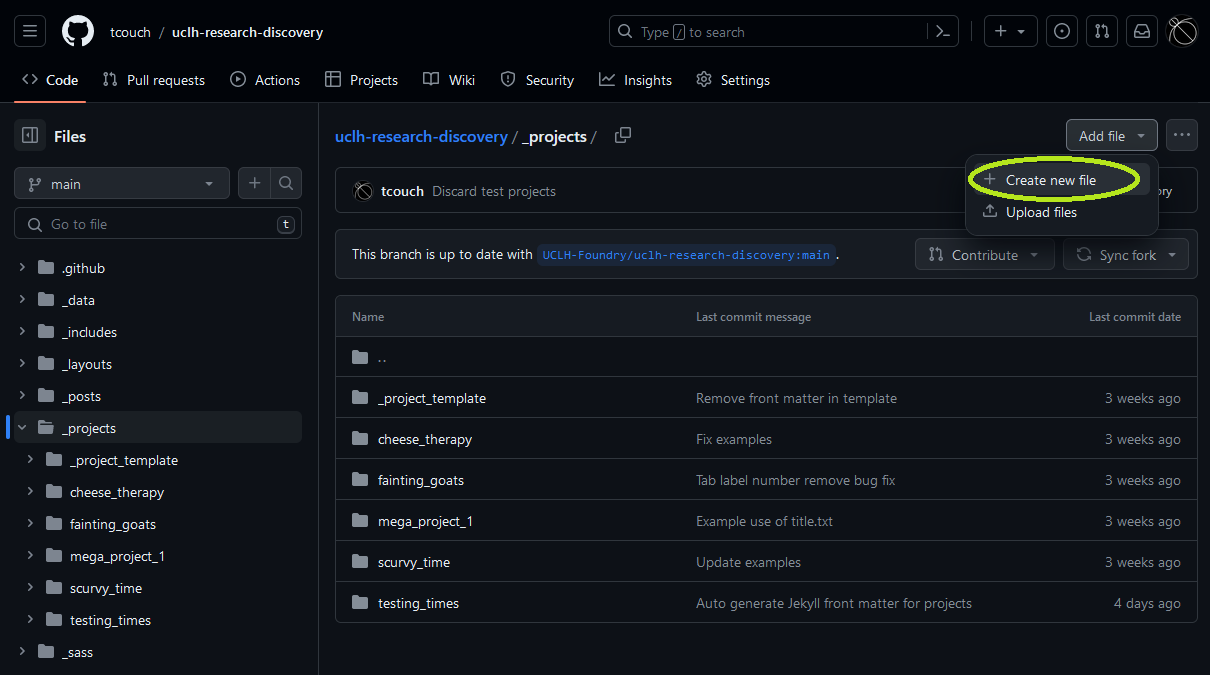
-
From within this folder, click Add file > Create new file
-
At the top of the page you’ll see an empty box with the placeholder text “Name your file…”. Enter the name of the new folder you’d like to create:
The name of the folder will be used to generate the title for your project (see below for how to override this)
followed by a forward slash/, and then the name of the fileindex.md:
-
You can now start writing a lay summary of your project written in markdown format in the text box below. You can include as much detail as you like, but you also have the option to add additional pages if you’d like to split things up into separate sections (see Extra content below).
- When you’d like to save your progress, click “Commit changes…”. In the pop-up enter whatever short message you think is appropriate to describe the changes you’ve made, then click “Commit changes”.
- To edit an existing file, locate and click on it in the GitHub repository’s file explorer, then select the pencil icon from the right of the toolbar:

If you’re new to markdown:
- Whilst editing a mardown file you can switch between the Preview and Edit views to get a sense of how your markdown content is going to appear on the page.
- This markdown cheatsheet to help you get started.
The metadata.yml file
Your project folder must also include a metadata.yml file which adds information about your project. The file, written in yaml format, can include a list of project authors (required), the title, and its status.
An example metadata.yml file might look like this:
title: Nature vs Nurture the UCLH Perspective
status: ongoing
authors:
- Charles Darwin
- Gregor Mendel
- Rosalind Franklin
- title
- By default the title for your project will be derived from the folder name by replacing any dash or hyphen characters with spaces, and converting the result to title case. Add a title here to override this
- status
- Each project page displays the current status of the project on a label displayed next to the title. This can be one of two options: ongoing or completed. If not included here, the default will be ongoing.
- authors
- This file must contain a list of authors added in the format shown in the example above
Extra content
If you’d like to split content across several pages, or include an embed link for your data, you can add extra content by including additional markdown or html files in your project folder. This content will appear in separate tabs across the top of the page.
The name of the file is used to generate the tab label for the extra content as follows:
- The filename suffix (.md/.html is removed)
- Any underscore(_) or hyphen (-) characters are replaced with spaces
- Digits at the start of the filename are removed
- Any whitespace remaining at the start or end of the name is removed
- The name is converted to title case
As an example, the tab label for 03_code-and_data.md would be “Code And Data”.
Tab order is alphabetical (except index.md which always appears first). To determine the order in which tabs appear, use numbers at the start of your filenames (e.g. 01_methods.md, 02_privacy.md, 03_data.html).
Assets
The site builder only picks up files with .html or .md suffixes as extra content to be included as tabs on the project page, anything else is ignored. However, you can use relative links to include other types of assets in your pages such as images, javascript, css etc. For example, you could create a folder inside your project folder called images, where you can upload all of the images you’d like to include in your pages. To upload a file, select “Upload files” from the “Add files” dropdown menu.
Quarto
If you use Quarto to generate an html page, you will find it generates a whole folder of assets that need to be included. No problem, just include the Quarto assets folder in your project folder alongside the html file, and the relative links to those assets should still work.
Step 4: Make a pull request
To publish your project, you will need to merge your new files back into the original GitHub repository. To do this you will need to submit a Pull Request. The pull request process allows us to review submissions before they are added to ensure they comply with our standards.
To open a pull request:
- Select Pull requests from the top navigation menu

- Click the green ‘New pull request’ button
- On the next page title “Comparing changes” you should see the base repository on the left (the original repository) with an arrow pointing to it from the head repository (your fork) on the right. Make sure the pull request is targeting the staging branch on the base repository (this should already be selected as the default option)

- Click ‘Create pull request’
- Add a title and description, including any details you think may be relevant for somebody reviewing your changes
- Then click ‘Create pull request’
Your pull request will then need to be approved by two reviewers who are chosen automatically from a pool of volunteer editors. Reviewers might sometimes make comments or request changes before approving your submission so please make sure you are able to receive notifications from GitHub in order to respond to their requests.
Once approved, your project will be merged into the main branch and it will automatically appear on the live website.