Trusted Research Environment
The FlowEHR TRE (Trusted Research Environment) provides a safe and secure environment to run clinical research on real data generated in clinical settings. The FlowEHR TRE builds upon the work of the Microsoft Azure TRE to provide access to cloud-scale computing environments to conduct real-world Machine Learning experiments from initial inception through to operational deployment.
TRE Workspaces are designed to be project-specific, with access to the Workspace resources and Workspace data restricted to the users assigned to the Workspace. Users from other Workspaces will not be able to see or interact with your Workspace resources or data.
1 Getting Started
Your TRE administrator will provide you with the following information: 1) Account details to logon and access TRE resources 2) The address for the TRE Portal 3) One or more Workspace IDs
2 The TRE Landing Page
TRE Workspaces are deployed to a virtual private network and the resources available in the Workspace are designed to have no direct internet access and are not accessible from the internet either.
To get access to your TRE Workspace, you must first logon to the TRE portal. Your TRE administrator will provide you with the URL to access the portal along with a logon id that grants you access to Workspace resources.
Once logged-in, you will see the TRE Landing Page:
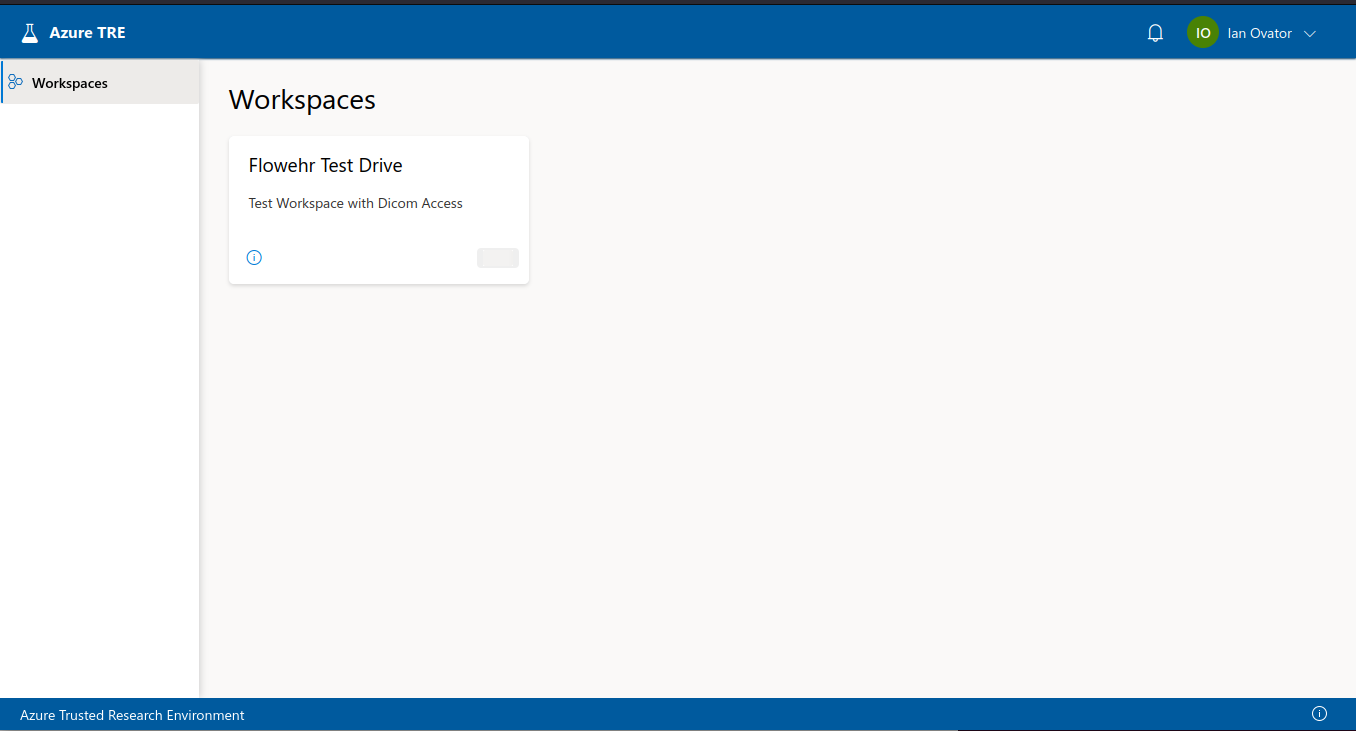
The main components of the Landing Page are:
- The TRE Header
- The TRE Navigation Side-Panel
- The ‘Workspaces’ Pane
- The TRE Footer
2.1 The TRE Header

The TRE Header contains the following links:
- The home link - a half-full (we’re optimists) beaker named ‘Azure TRE’. Use this link to return to the Landing Page from any location within the TRE application.
- A notifications bell - an icon which can be used for quick access to any notifications you may have
- An account link - you can use this link to logout of the TRE
2.3 The Workspace Pane
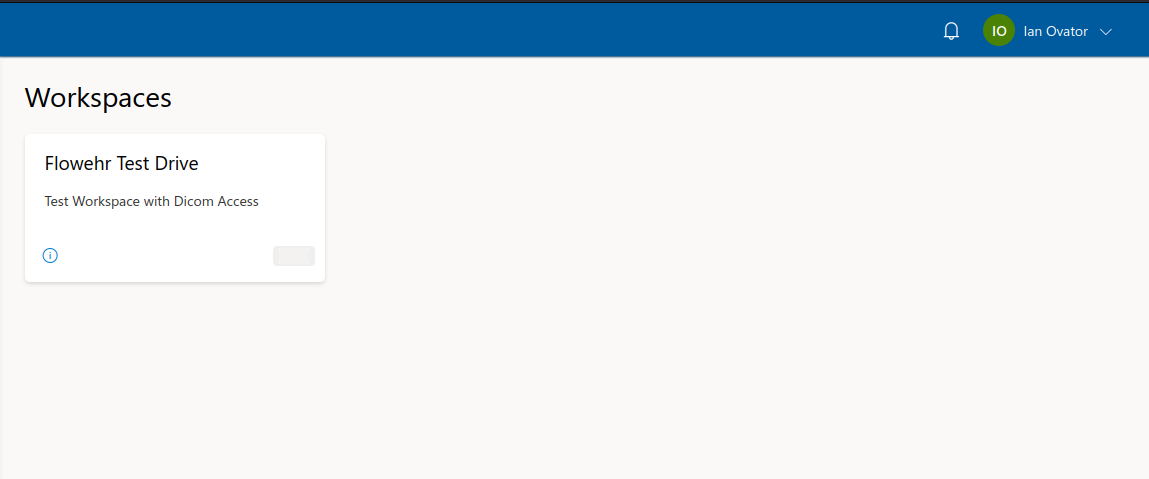
The ‘Workspaces’ Pane contains Card(s) for the Workspaces that you have been granted access to in the TRE.
Each Card displays:
- The Workspace Name
- Description for the Workspace
- An information button
- A Cost-Notifier button: displays the accumulated costs for the workspace
Clicking the Workspace Name or a blank space on a Workspace Card will connect you to the Workspace.
3 Using a Workspace
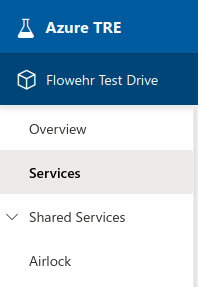
Once connected to a workspace, you’ll be able to see the services installed in the Workspace and also the Shared Services available to all Workspaces.
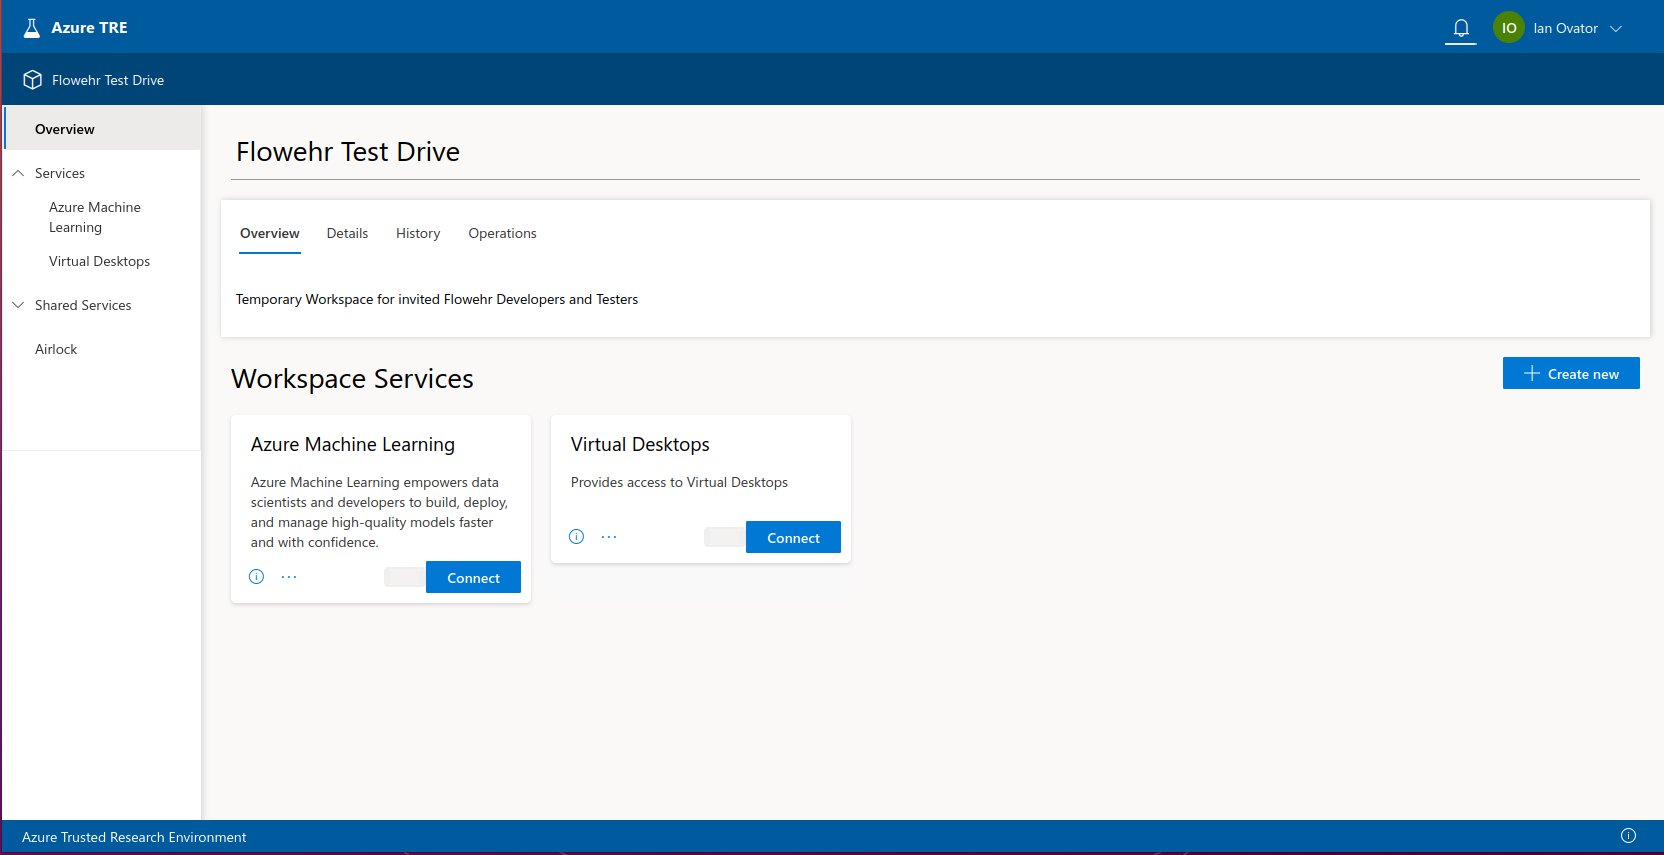
The ‘Create New’ button can be used to add services to the Workspace. Only TRE Administrators or Workspace Owners can add Services to a Workspace.
However, certain Workspace Services provide User Resources which enable all workspace users to add these resources to the Workspace. Specifically, the Virtual Machines Service provides a Virtual Machine User Resource. Once the Workspace Owner has added a Virtual Machines Service to the Workspace, users can connect to the service and add Virtual Machines for their personal use.
From the Workspace Overview page, you can find important information about your workspace by clicking the details tab. One key piece of information here is the ‘Workspace id’. This is a four-character code, that is appended to the names of the resources deployed in your workspace. Workspace ID can be useful to know when you are connecting to resources such as AMLS
3.1 Access a Virtual Machine
Look for the Virtual Machines or Virtual Desktops Service in the Services section of your workspace:
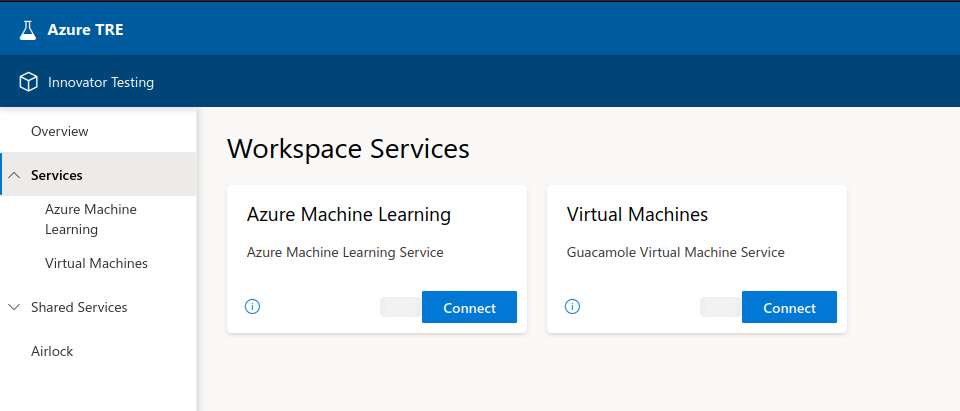
Avoid the ‘connect’ button and instead click on the title of the Virtual Machines Service Card. This will take you to a page showing all the Virtual Machines that you have access to:
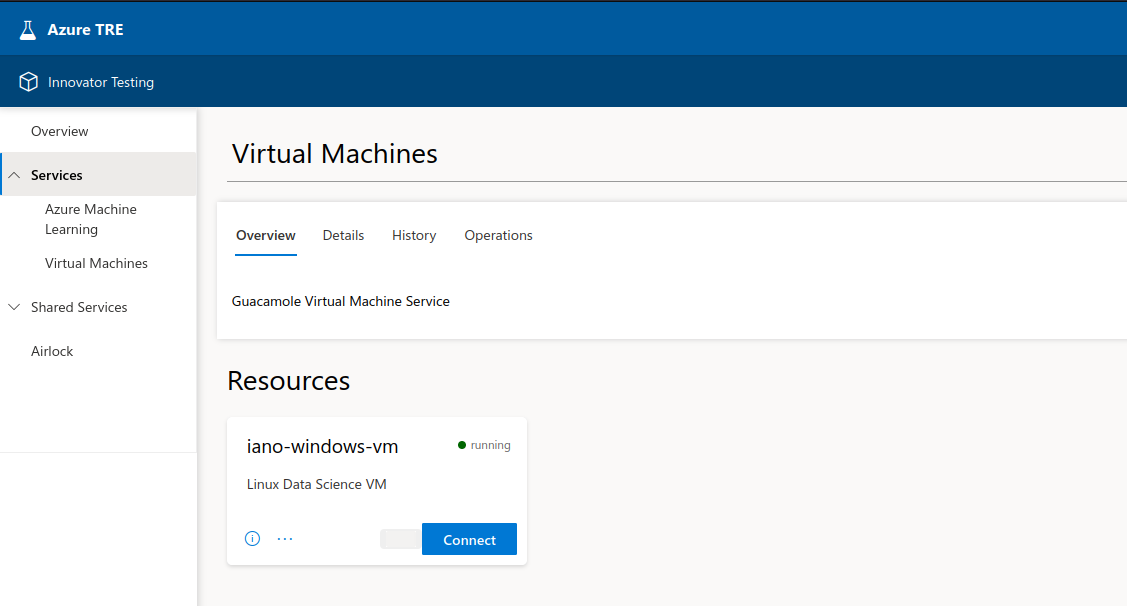
The Virtual Machines in your Workspace allow you to interact with the private resources in the Workspace and with the Shared Services common to all workspaces. When you connect to a VM that you have created, you will be automatically logged-in with a user account with administrator rights. So, on a Linux VM, you will be able to run privileged commands via sudo.
Detailed instructions for using a VM can be found in the Accessing Virtual Machines document
3.2 Azure Machine Learning Services (AMLS)
The Azure Machine Learning Services in your workspace are provisioned in a private virtual network - there is no direct access to the service over the internet. Because the Virtual Machines are deployed to the same private network as AMLS, you can connect to AMLS from within a Virtual Machine.
You’ll need to know the URL to use for connecting. Click on the Azure Machine Learning service in your workspace then select the details tab. Towards the bottom left of this page you will see the value for the ‘internal connection url’ which you can use to access the AMLS service from your Virtual Machine.
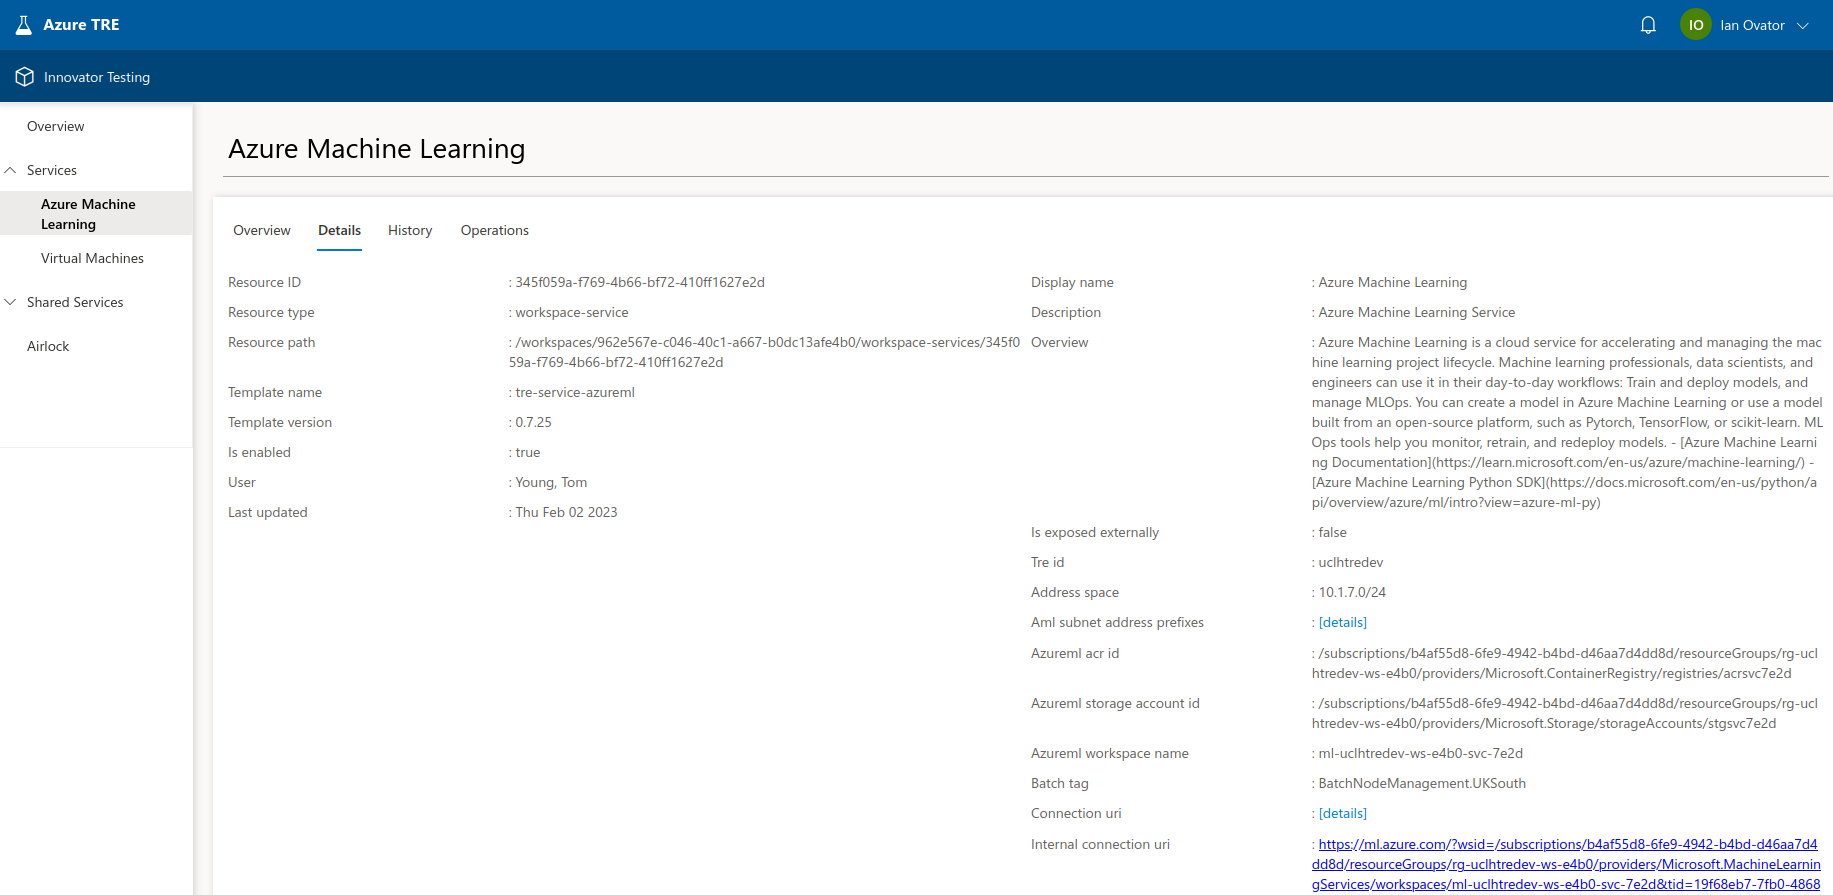
An alternative to copy and pasting this URL, involves using your Workspace ID (which you can find in the via Workspace > Overview > Details). Having logged-on to your workspace VM, navigate to ‘https://ml.azure.com’ and sign-in using the same credentials that you use to access the TRE. Then navigate to ‘Workspaces’ and select the workspace corresponding to your TRE Workspace ID (the resource group for the workspace contains the workspace id as its last four characters):
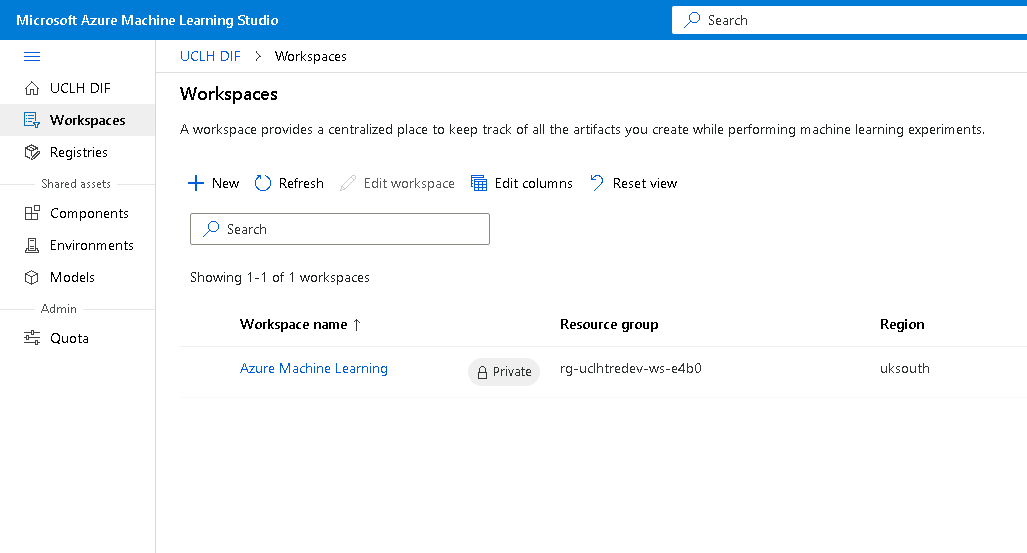
Once connected to the AML Workspace, you will need to create a Compute Instance to access Jupyter or run a terminal shell. Whilst you can do this from within the AML Workspace, you can also add a compute instance using the TRE Portal:
- Navigate to the Azure Machine Learning service in the TRE Portal and select ‘Create New’ in the ‘Resources’ section.
- Click ‘Create’ on the ‘Azure Machine Learning Compute Instance’ item
- You can accept the defaults for most of the fields, although you may want to change the ‘Name for the user resource’ fields
- The final field requires your Azure Active Directory User Object-ID, you can find this by running the following commands:
az login --tenant <tenant name>
az ad signed-in-user show --query id -o tsv
